 Creating a banner using Adobe Photoshop isn’t that much of a deal. This is a beginner level tutorial and describes a simple procedure for creating a professional looking banner in Photoshop. The entire process can be completed within a few minutes.
Step 1: Getting Started
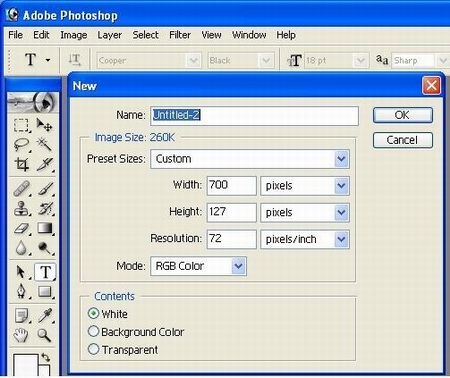
First of all do a little bit of brainstorming, to create a rough idea about how you want to create banner for your own or client’s website. Makeup your mind and open the Photoshop window. Open a new page and set the height and width of the window. I set it to 700×127; it basically depends on your requirements. Name the newly created project, or select the default name.
Step 2: Place Images
Now let the creative work begin. Choose pictures for your banner, don’t put too much pictures on your banner. Be advised that most high resolution images are copyrighted, but you can search for loyalty free images on internet (mostly thumbnails).
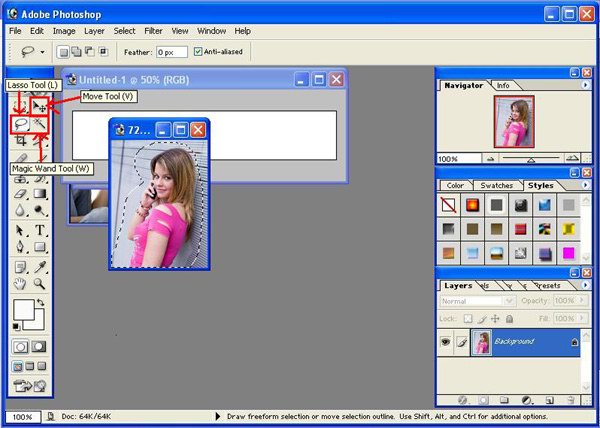
You can cut desired portion of an image with or without its background, as required. Suppose if you want to remove background of the image, look for lasso tool in the tools menu. Use lasso tool for selecting the image (it is pretty much just like cutting a picture using a paper cutter). You can remove extra background through magic wand tool, also found in the tools menu. Now through the move tool place the image in your banner, just drag and drop.
Step 3: Place Text
You can also place some text in your banner. There are lots of text styles available in Adobe Photoshop; you can also create more effects.
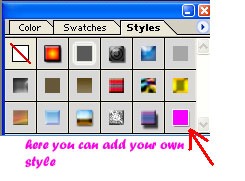
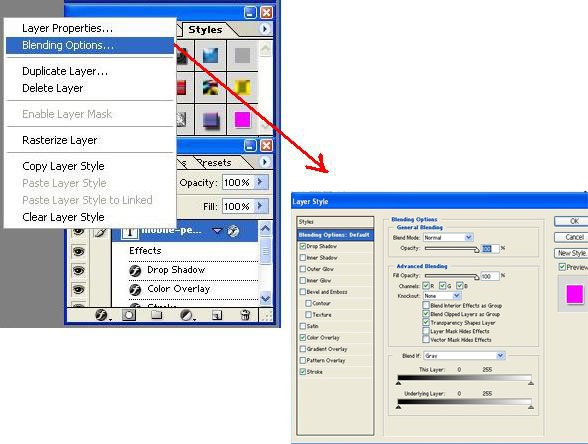
If you want to add your own effect then just right click on you text layer and then click on blending option. In the blending menu you can select different option for making your text more attractive.
Step 4: Bring Image Behind Text
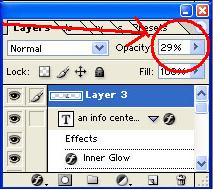
If you want to place an image behind the text then you should decrease the opacity of the image.
So that wasn’t so tough after all. Here is my banner that I made in just 3 minutes.

